Micro Blog
Since I haven’t been working on this project for the last few days, I decided to jump back in and watch some videos on using raycasting, mixins, integrating physics and hand-controllers.
I don’t think I have use for the hand-controllers, but it’s nice to know there are tools available to help test the experience through a simulation. This is made possible via browser extensions:
- Firefox: https://addons.mozilla.org/en-US/firefox/addon/webxr-api-emulator/
- Google Chrome: https://chromewebstore.google.com/detail/webxr-api-emulator/mjddjgeghkdijejnciaefnkjmkafnnje?hl=en
To apply what I learned today, I’ve updated the interaction example to use mixins instead of copy and pasting the same code. This effectively uses the DRY methodology.
First you need to make sure you have the asset manager defined
<a-assets> ...insert mixins here </a-assets>
Next define your mixin and give it an ID so that it can be referenced in any of your entities in the scene. You are not limited to just geometry, I’ve also included colour mixins.
<a-assets>
  <a-mixin id="myshape" geometry="primitive:box"></a-mixin>
  <a-mixin id="blue" material="color:#4CC3D9"></a-mixin>
  <a-mixin id="red" material="color:#EF2D5E"></a-mixin>
  <a-mixin id="yellow" material="color:#FFC65D"></a-mixin>
  <a-mixin id="green" material="color:#7BC8A4"></a-mixin>
</a-assets>
Then finally, we remove the duplicated components and replace it with the mixin component. We can add multiple mixins by joining the IDs with a space.
<!-- FROM THIS -->
<a-entity
  foo
  geometry="primitive:box"
  material="color:#4CC3D9"
  position="-2 0 -3"
></a-entity>
<!-- TO THIS -->
<a-entity foo mixin="myshape blue" position="-2 0 -3"></a-entity>
So now if I decide to change the primitive across all the elements, I can just update the myshape mixin geometry component.
Unfortunately, after some experimentation, it looks like I can’t add custom components into the mixin.
Note: The order of how you write the mixin matters. It runs in order of first to last. So the last will override any previous classes that were called.
You can find the colour-changing interaction here: Interaction - Colour Change
I went outside for a walk yesterday and managed to find a cool spot to capture a photosphere.
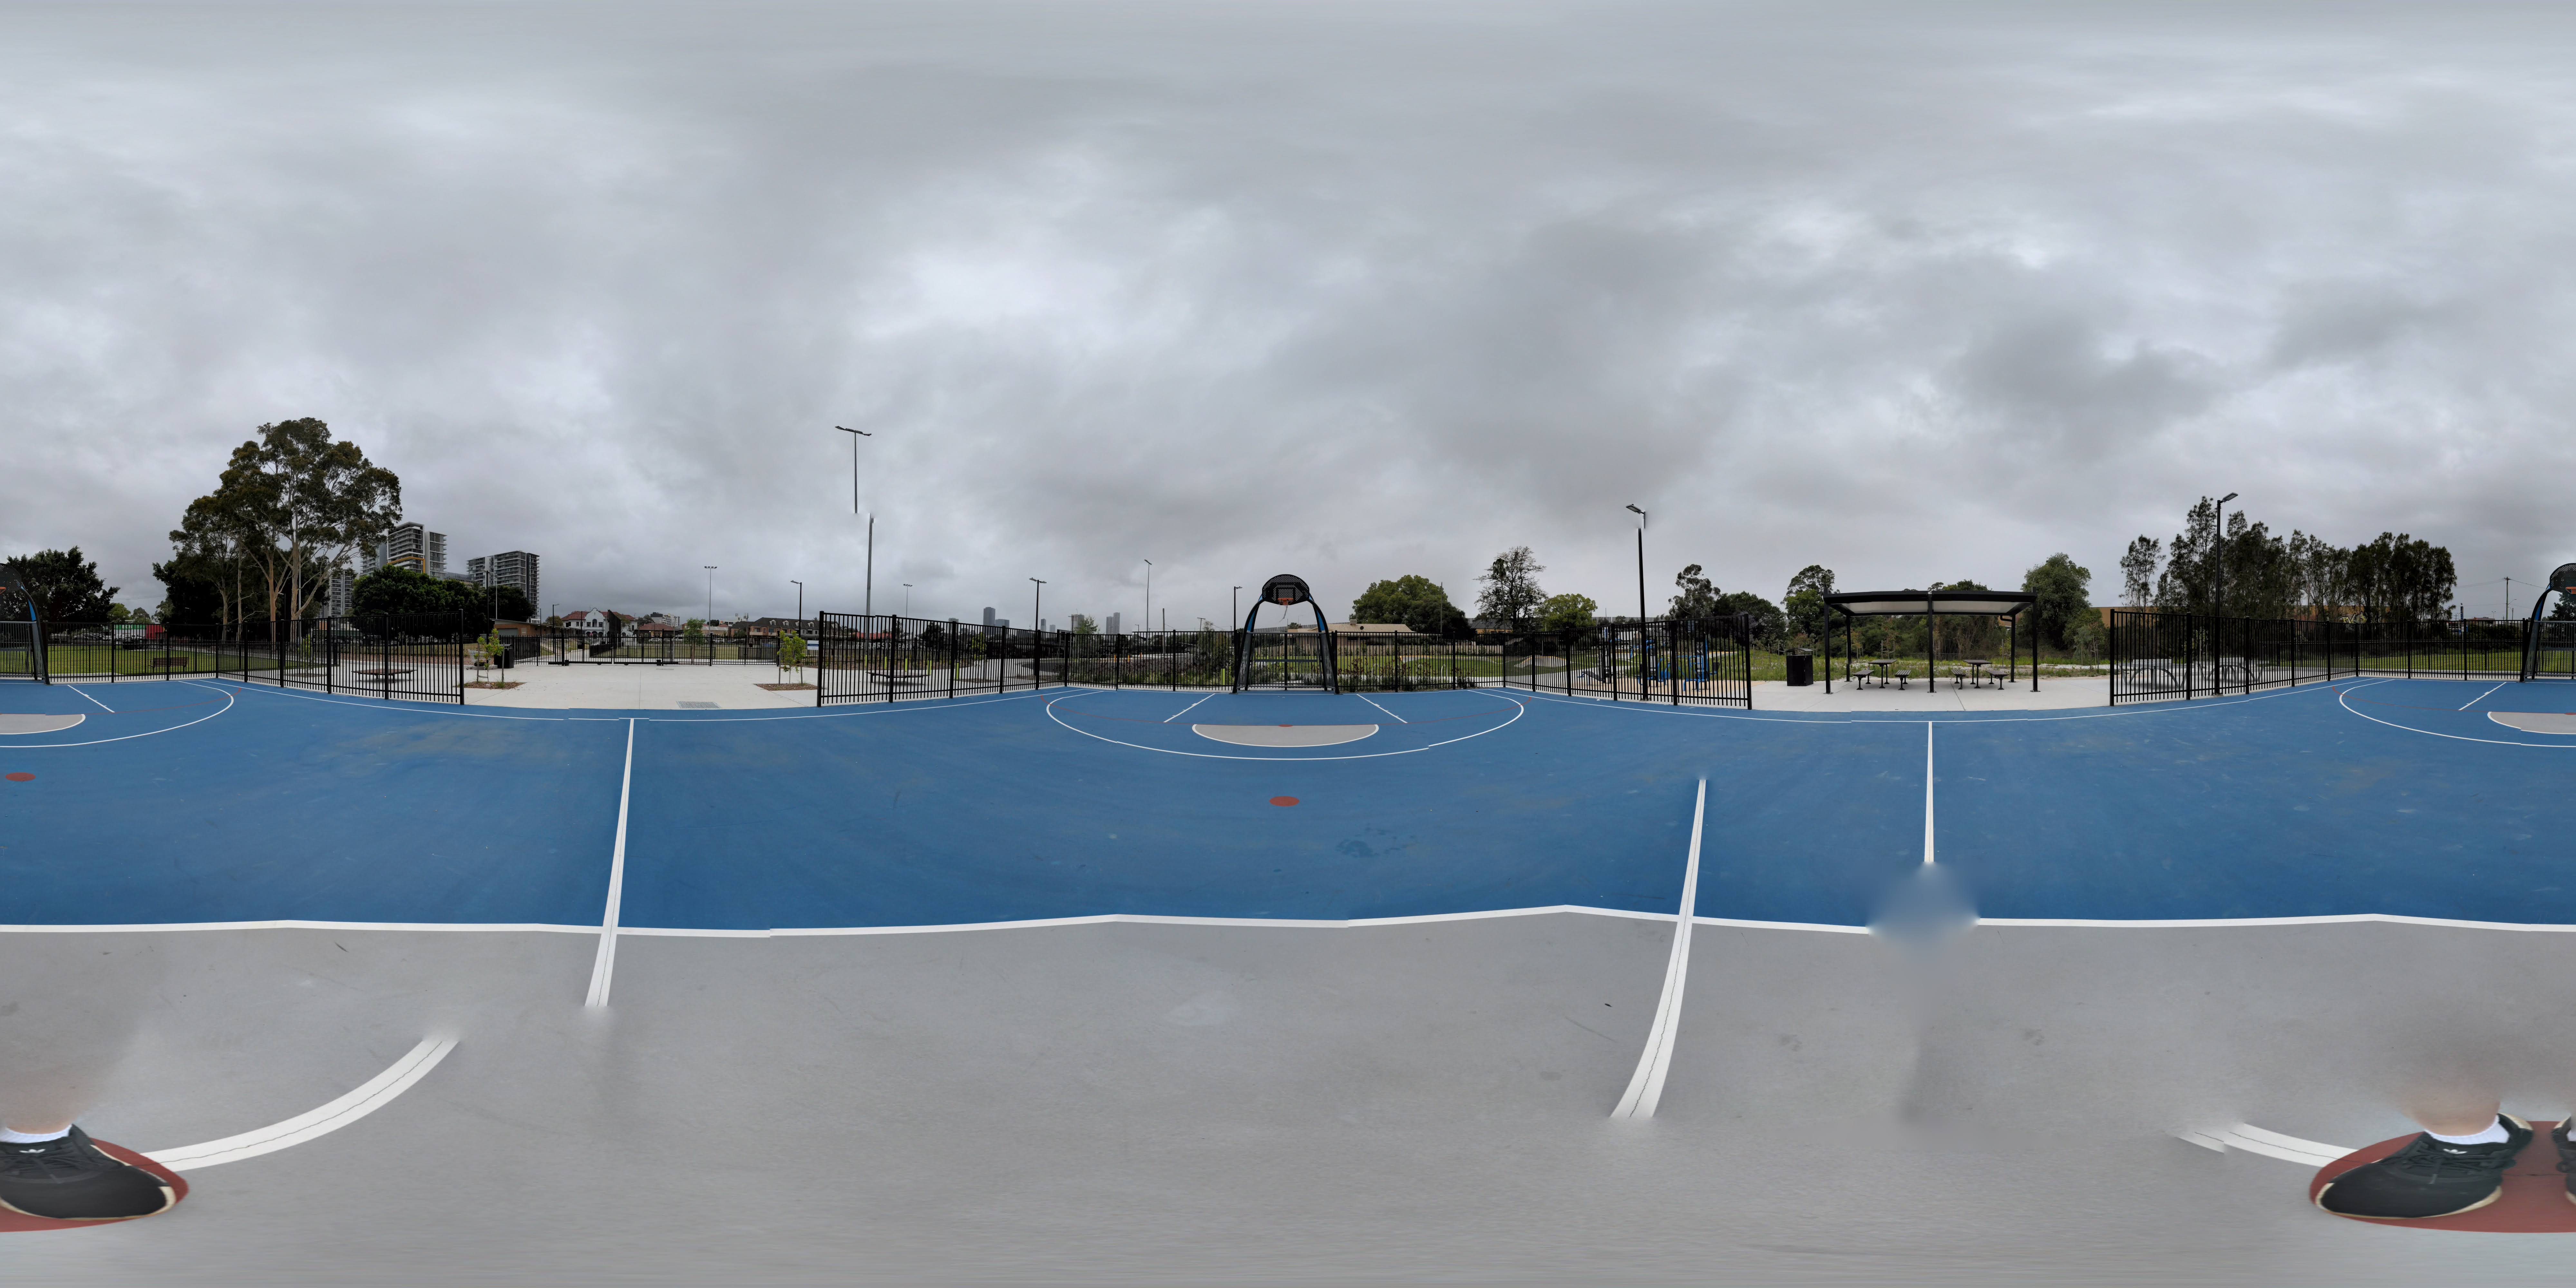
Still trying to work out the kinks of capturing this type of image, but otherwise I’d say it’s pretty good. After I’d taken the photosphere, my camera also tried to blend in the parts of the image that I’d missed.
You can find the photosphere experience here: Skybox 2
I also spent some time figuring out how to update the sky of the interaction to change colour just on hover.
There were two additional events I needed to listen for:
- mouse enter
- mouse leave
It was as easy as extracting the current colour of the element that was hovered and setting the colour attribute of the sky element with that colour.
You can find the colour-changing interaction here: Interaction - Colour Change
Today I learned how to create my own component in A-Frame!
Each component you create comes with a set of lifecycle methods. It also comes with a schema by default which you can set up - I think comes from object-oriented programming.
// Registering component in foo-component.js
AFRAME.registerComponent("foo", {
  schema: {}, // insert default data here
  init: function () {},
  update: function () {},
  tick: function () {},
  remove: function () {},
  pause: function () {},
  play: function () {},
  // when an event happens
  events: {
    click: function () {},
  },
});
To register the component, you reference it to an entity.
<a-entity geometry="primitive: box;" foo></a-entity>
To summarise the project I was working on, basically I wanted to have elements scattered in view. Each element had a specific colour assigned to the material. When a user moves around with the cursor, the background (or sky) would change to follow that colour.
For this functionality to work, I needed to use the events listener which listened for a cursor event. There are two ways that a cursor can “click” an element:
- hover enables the click (triggers once)
- pointing on the element and you either click the mouse or touch the screen (can click multiple times one after the other)
These options are set via the cursor element - where fuse set to true enables click on hover (option 1).
<a-entity camera look-controls>
  <a-entity
    cursor="fuse: true; fuseTimeout: 500"
    position="0 0 -1"
    geometry="primitive: ring; radiusInner: 0.02; radiusOuter: 0.03"
    material="color: black; shader: flat"
  >
  </a-entity>
</a-entity>
Other than that, I was having some troubles with following examples because I had set up Astro to use TypeScript. Luckily there was a types package for A-Frame as well as sample code I could implement for building custom components.
There’s still some work to be done, but you can find project 3 here: Interaction - Colour Change
Since having found out yesterday that my phone (Pixel 4a) has the photosphere option built into the camera, I thought I’d give that a try.
The experience of taking a photosphere was interesting because you’re effectively taking multiple shots of the same location but at different angles. The accuracy of the final output is difficult to get right when you’re relying on your own hands to manouvre the camera in the correct angles relative to the centre. I think some form of AI in the camera was used to process the image, but it still doesn’t produce a picture perfect result.
After some research, there are alternative solutions to use in order to create 360 images:
- 360 cameras like the “Insta360 X” series cameras
- Stabilizing arm such as the “Insta360 Flow”
- Built-in photosphere camera (some phones have this feature)
So today, after attempting to capture a 360 photo of my balcony (which I didn’t end up publishing) - I worked on the second project in the series: Skybox
In the final project, I used this equirectangular photo by Greg Zaal on Poly Haven.
To use this image, we need to load it in via the asset manager
<a-assets>
  <img id="photosphere" src="/a-frame/ref/rogland_clear_night.jpg" />
</a-assets>
We can then apply the image as a material to the sky primitive.
Note: The sky primitive only accepts equirectangular images
<a-sky src="#photosphere"></a-sky>
An alternative to using an equirectangular image and a sky primitive is to create a cube and applying a cubemap version of the 360 image.
I found a Panorama to Cubemap applet that does exactly that.
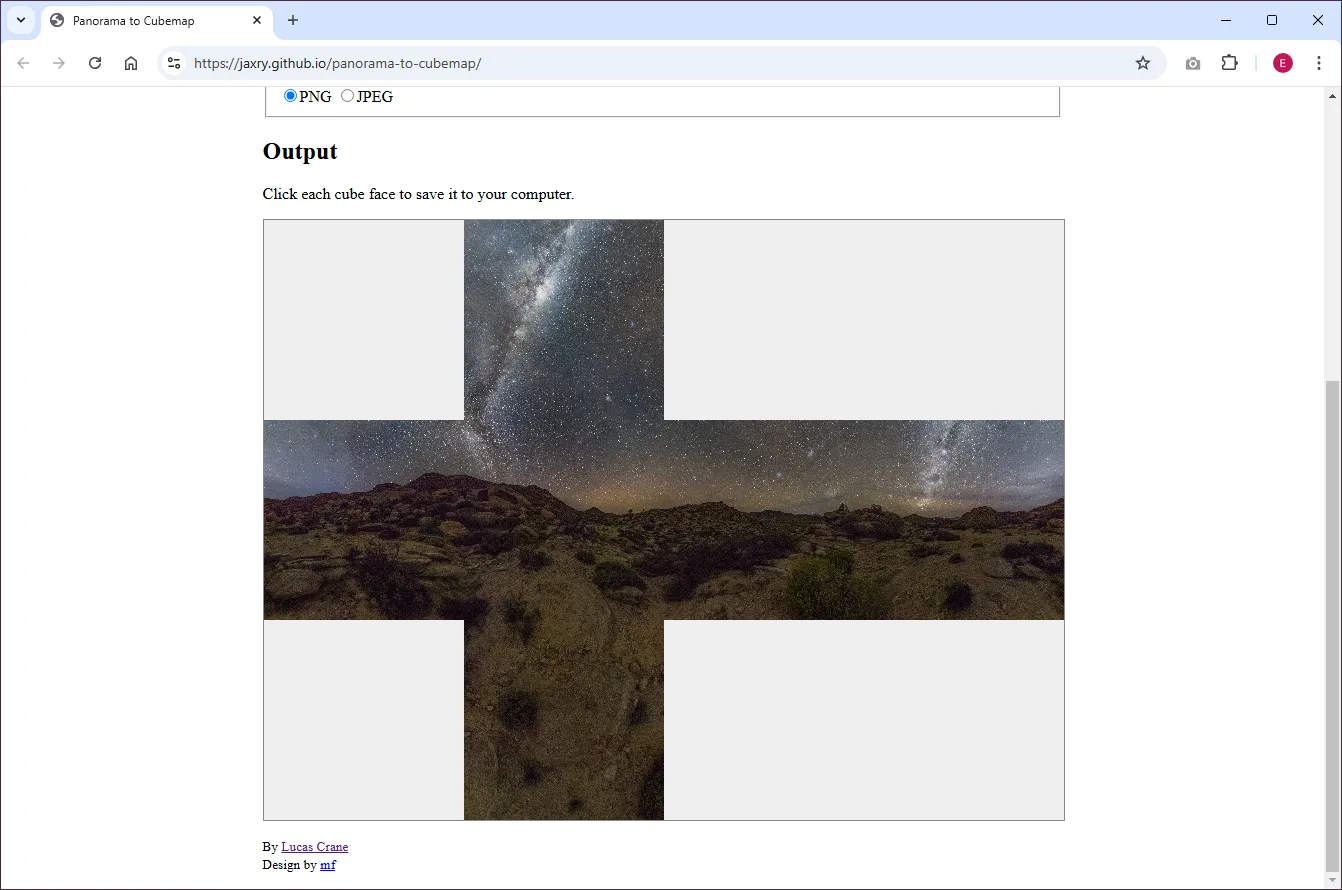
Also something to note is that iPhones and Safari users will likely need to allow permission for using the orientation of the device. So make sure to use the device-orientation-permission-ui. Note: I have yet to test whether this works
You can find project 2 here: Skybox 1
So it turns out that yesterday I had miscalculated the circumference of the curved image! 😅
Instead of dividing both height and width by 4, I needed to figure out the ratio between the two values…
In the image below, you can see that I’m using an image of dimensions 9508 x 1660. I’m looking to have the height set at 4.

Next I decide the height of the curved image (which in this case is 4). From there I can use it to multiply it against the height to get the resulting width.
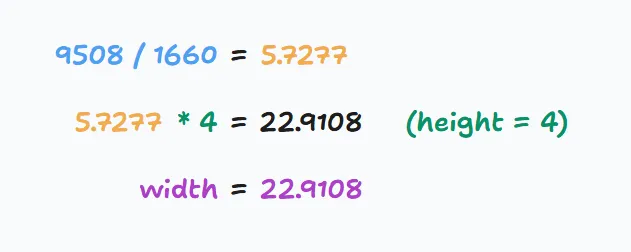
Final bit of maths I needed to do was to fill in all the properties in curved image as mentioned in their docs
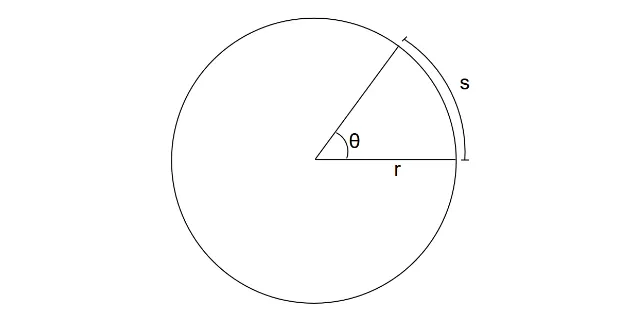
From the diagram above, the following formula is deducted
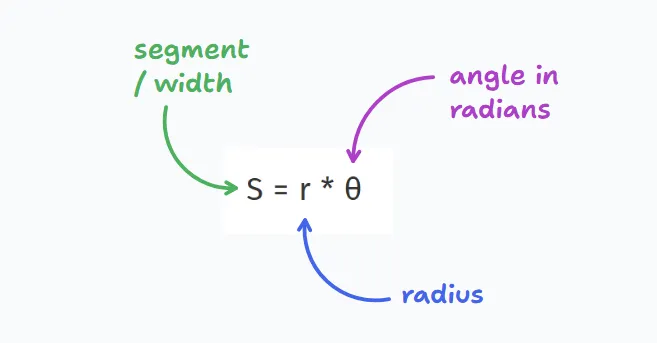
All I needed to do was figure out the radius
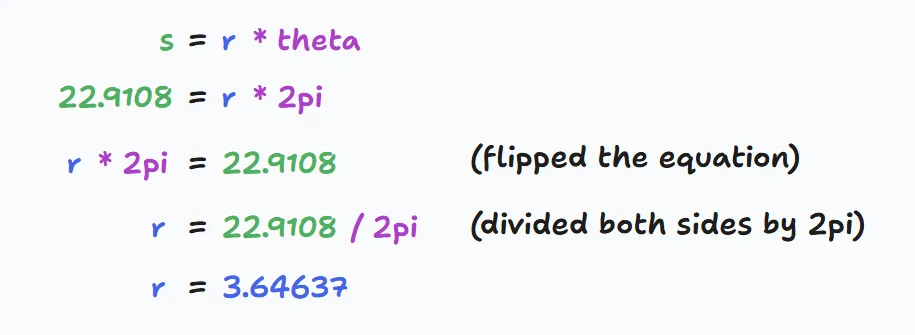
Then fill in the values where theta-length is in degrees
<a-curvedimage
  src="#panorama"
  height="4.0"
  radius="3.64637"
  theta-length="360"
></a-curvedimage>
Then for final touch ups, I made sure to position the user to the centre of the curved image and limit the user to only be able to look around.
Because of the way panoramas work, the experience I built is less impressive when you can see the top and bottom edge.
It is a better experience when you rotate your phone horizontally to align with the image
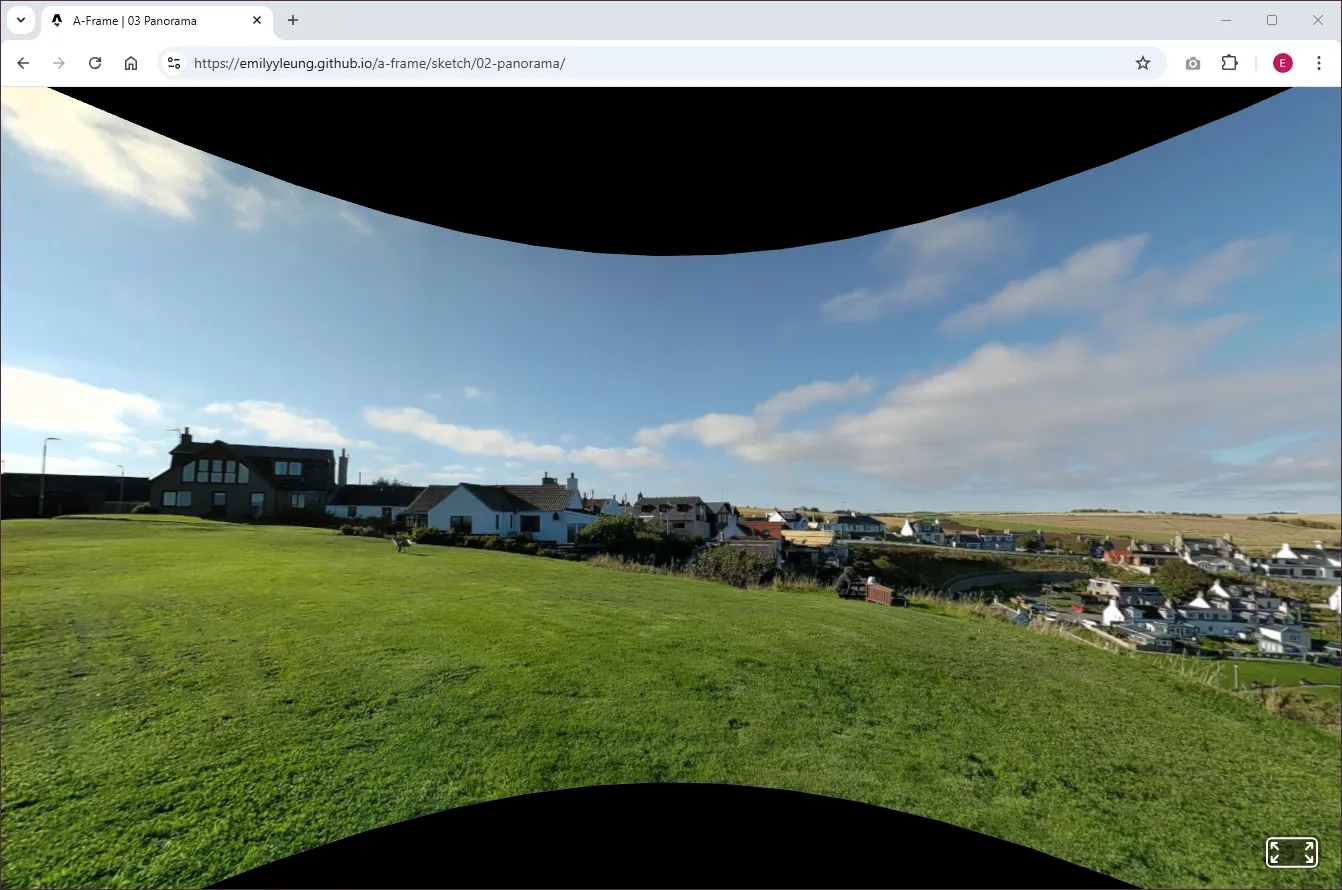
So I spent a bit of time researching how to improve the experience of viewing panoramas. Here are a couple of ideas I picked up from this video:
- If possible, set the camera to use 0.5 zoom to capture more of the above and below
- Capture 5 minutes worth of sound to embed into the experience (if it’s windy, block the wind with your hands)
Best viewed horizontally, you can find project 1 here: Panorama